This Vampire Nail Art Design was initially inspired by one of my absolute favourite nail artists, Melissa on Instagram (@nailsbymelissasmi)! She does so many fun and happy nail art designs which make me go “awww!” 😀
If you have an IG account, I highly recommend you to follow her! She has such a great positive vibe ;D
Okay, here is the mini tutorial of this design!
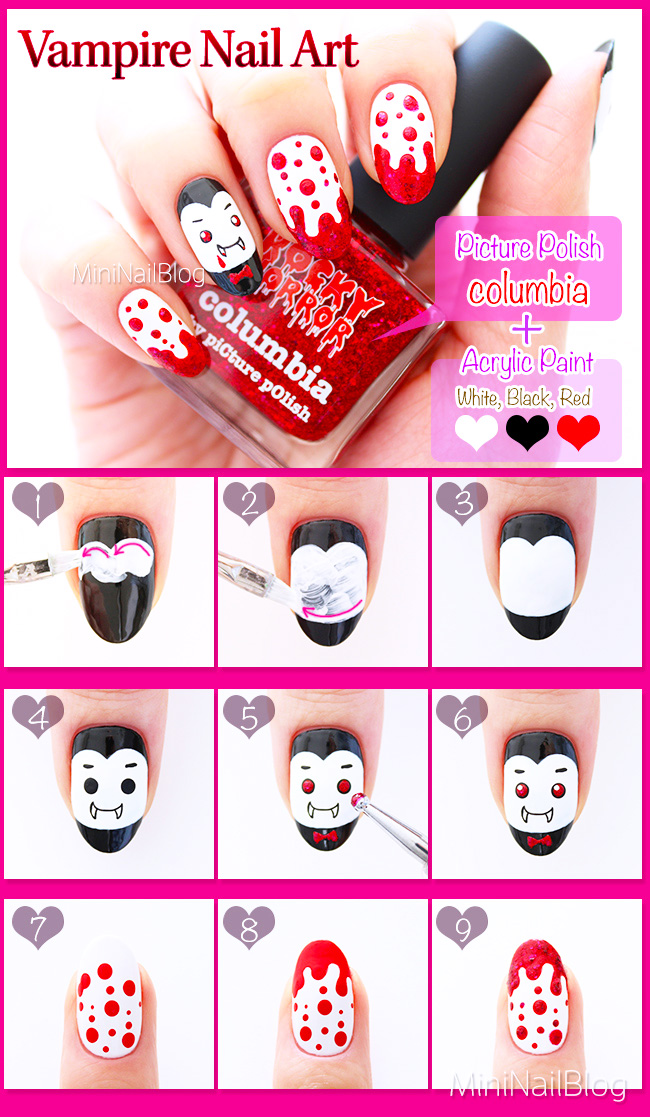
- Apply black nail polish on the thumb and ring fingers. Draw the vampire’s forehead with white acrylic paint, using an angular brush.
- Draw the face line and fill the whole face.
- Apply a few layers of paint to cover the brush streaks. Make sure to allow each layer to dry before applying another one on top.
- Draw the facial parts with black acrylic paint.
- Fill the eyes and draw the bow-tie with red acrylic paint. Add red glitter polish on top.
- Add the sparkles in the eyes with white acrylic paint.
- Apply white nail polish onto the rest of the fingers. Draw dots with red acrylic paint using a dotting tool.
- Draw drips on the free edge.
- Add red glitter polish onto the red paint. Apply top coat to complete.

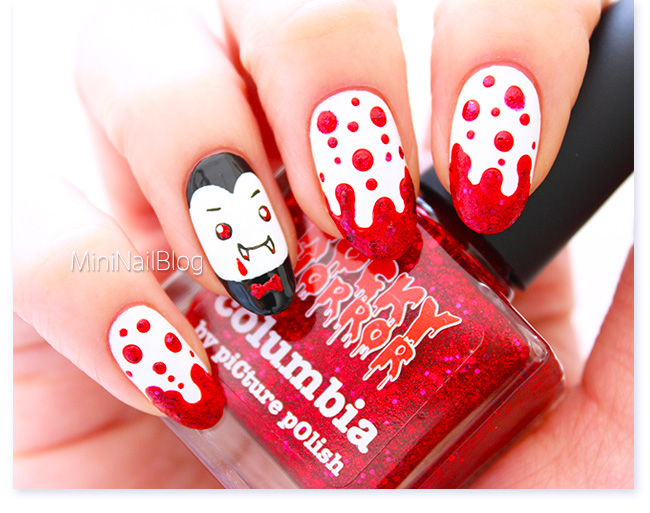
The red glitter polish I used in this design is “columbia” from Picture Polish. The way it sparkles is fantastically gorgeous!! I can’t wait to use this for my Christmas designs too 😀
Thank you for visiting!! <3xxxx


hehe, guess no one will be scared by this vampire 😉
Yeah! People will laugh at him instead ;p