 I know it isn’t Autumn here, but I’ve been inspired by so many great Autumn nail art designs out there! Especially this acorn nail art by Stefanie from Fairly Charming, they’re adorable and perfect for Autumn!! She does so many beautiful designs and they’re all super inspiring!! So please make sure to check her out 😀
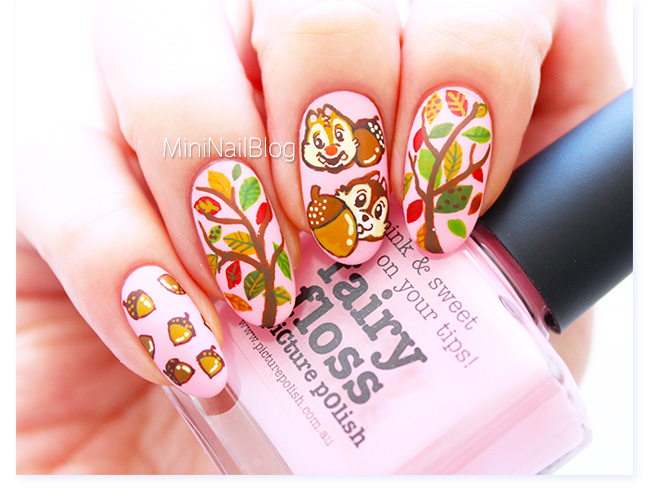
I decided to use a pink background and added Chip and Dale so that I can still call it a Spring design… maybe a little bit too forced? 😀
Anyway! This is the mini tutorial of my Chip and Dale nail art, and I hope you like it!!
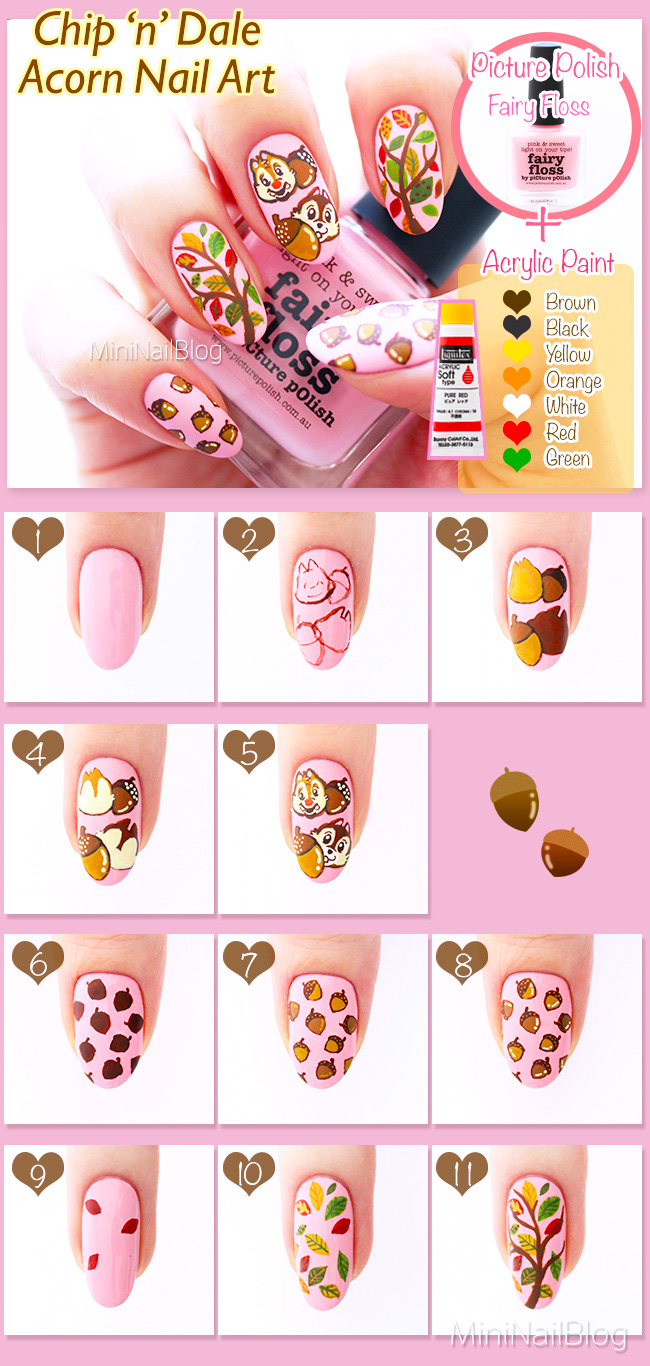
- Apply pink nail polish on all nails. (How to Apply Nail Polish Properly)
- Draw a rough design of Chip and Dale with dark brown acrylic paint (brown + black). (How to Hand Paint)
- Fill each shape with dark brown and light brown (brown + yellow) acrylic paint.
- Add a cream colour (yellow + white).
- Draw the facial parts with dark brown acrylic paint.
- On the thumb and pinkie, draw the shape of acorns with dark brown acrylic paint.
- Fill each acorn with different shades of brown.
- Add shines with a cream colour acrylic paint.
- On the index and ring fingers, draw a few leaves with dark red acrylic paint (red + brown)
- Keep adding the leaves with different colours.
- Draw the tree on top of the leaves. Apply top coat to complete.

The pink base colour I used today is Fairy Floss from Picture Polish! I’m so impressed by its drying time. I tend to apply creme polishes quite thick (3 coats), and often smudge them because it takes forever to dry. But this one dried instantly and I was able to move onto hand painting straight away!
Thank you for visiting!! <3xxx


omg, this is so cute, love it <3
Thank you so much!!! <3xxxx