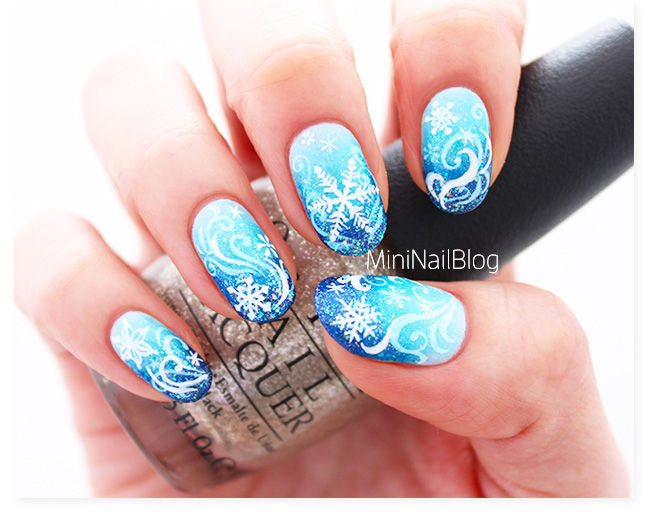
It’s a bit too early for Christmas, but snowflake nail art was the only thing that came to my mind when I was trying to come up with “Delicate Print” nail art for the 31 Day Challenge.
I haven’t drawn snowflakes for ages and it was certainly a backbreaking job because I get so close to my nails when I’m drawing, hehehe. If I had stamping tools I’d definitely be using them all over my nails!!
Here is the mini tutorial for this design! I hope you enjoy.
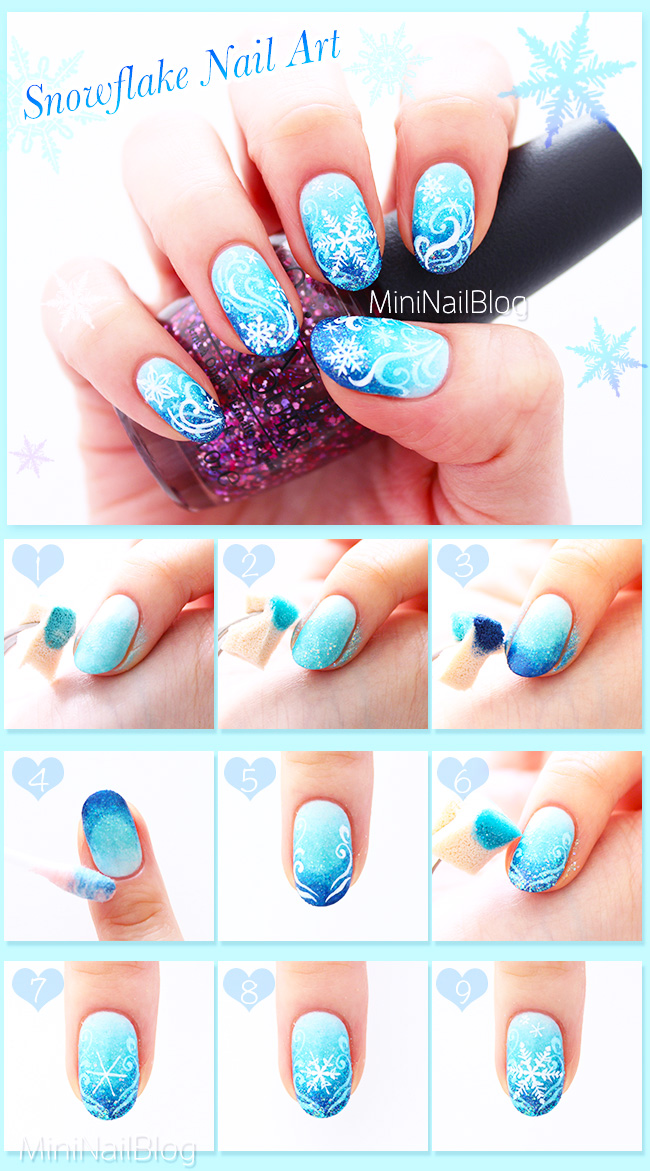
- Apply baby blue nail polish on all nails. Apply aqua nail polish with a piece of makeup sponge to create a gradation.
- Apply blue glitter polish with a sponge.
- Apply royal blue polish onto the free edge.
- Clean up the skin with nail polish remover.
- Draw random swirls with white acrylic paint. (How to Hand Paint)
- Apply blue glitter polish over the drawings with a sponge.
- Draw snowflakes. Start with three evenly spaced lines which cross in the middle.
- Add small lines.
- Gradually make the design bigger. Apply top coat to complete.
I’m sorry for not including the nail polishes I used. The polishes I used were all mixed by me and I’m not even sure which polishes I mixed together to create these shades.
If you’d like to know specifically how to draw snowflakes etc, please let me know! 😀
Thank you for visiting!! <3xxx


OmG I am so gonna steal your designs come Christmas! 🙂 they’re magical! If only I can free hand well enough. Anyway, I’ll stop spamming.
OH! Yes pleeease!! I’m sure you’ll do much better job than me!!!
Thank you so very much for finding me and spamming me, Jamie!! <3xxxxx