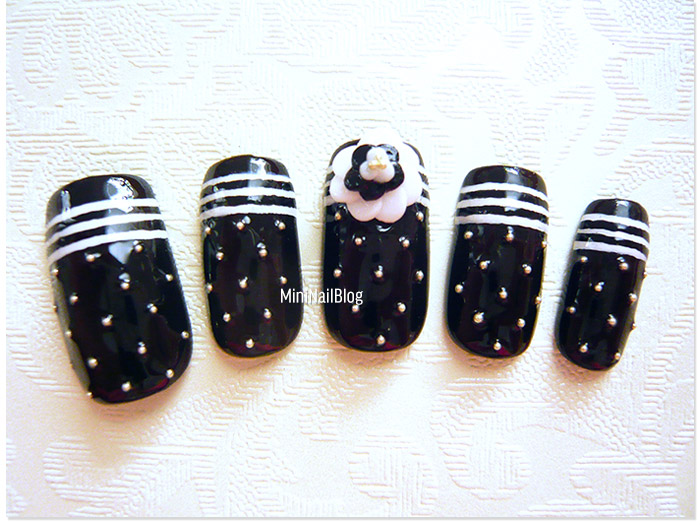
I was up to completing the base of this retro flower nails yesterday (click here to see the post). Today, I’ll show you how I made the layered flower with acrylics and complete the design!
– Retro Flower Nails Part 2 –
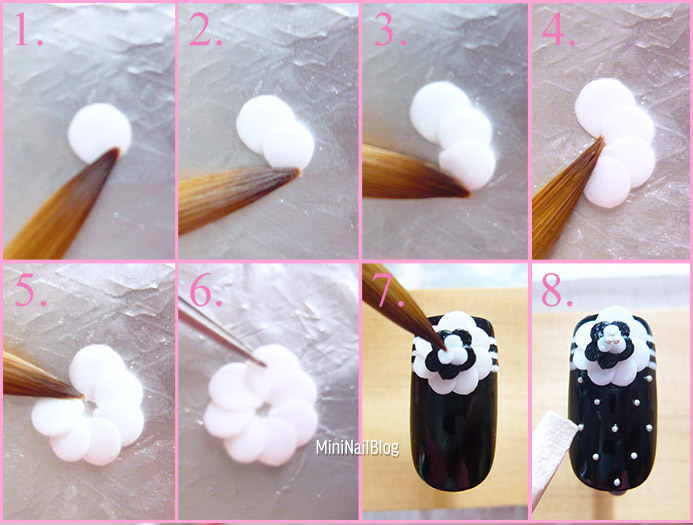
- Making Petals Place a small white acrylic mixture onto a piece of foil, and flatten with the belly of the brush. Allow it to set before moving onto step 2.
- Make another petal slightly overlapping the first petal.
- Make sure the mixture is set before applying the next mixture to prevent them from merging into each other.
- Keep adding petals, placing them in a circle.
- Occasionally press the petals down to keep them in a flat profile.
- Lift the first petal while the last petal is being created. And then rest the first petal on top of the last petal.
- Repeat the same steps to create three layers of petal. Use black mixture for the middle layer.
- Place silver bullion beads onto the nail.
- Apply top coat to seal.
It is time consuming and maybe unrealistic to wear this design, but I really enjoyed making it 🙂 Once I started creating something repetitive, such as these petals or reindeers from the other post, I just keep going and going until I realise that I skipped my dinner! Hehe
Thank you!


what did you use for the white pedal? was it powder for fake nail?