
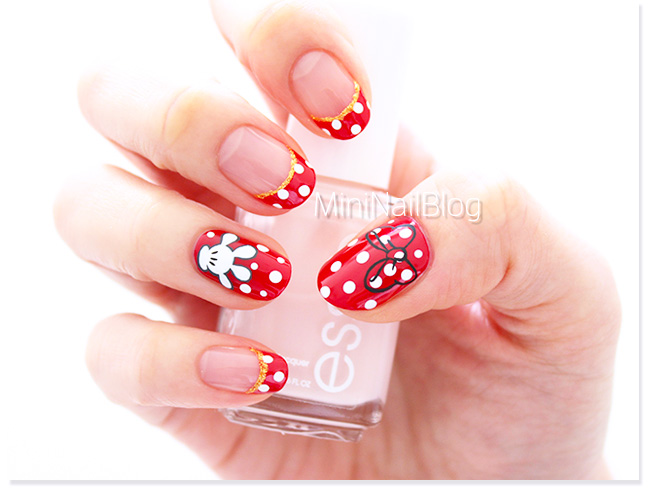
Today is the first day of THE 31 DAY CHALLENGE and the theme was “Red Nails”. I wasn’t sure if I could only use shades of red polish to do the nail art, or I can do anything as long as I use the colour red in the design somewhere. So I decided to do a design mainly with red.
When I see the girly red colour, the first thing that comes to my mind is…Minnie Mouse!! I think she is the symbol of perfect girliness (serious face).
Anyway, enough rambling! Here is the step by step Minnie Mouse Nail Art tutorial.
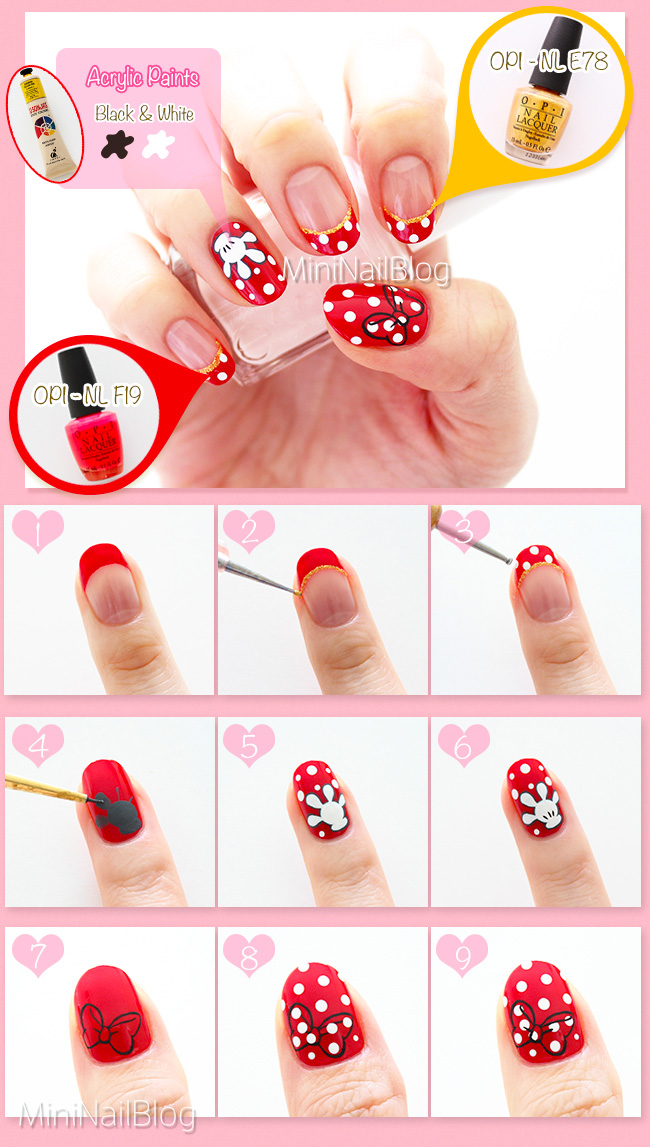
- Create a french look on the index fingers, middle fingers and pinkies with OPI NL F19. (How to do French Nails)
- Draw a line along the smile line with OPI NL E78 and the skinny side of the dotting tool.
- Apply some polka dots on the french with white acrylic paint.
- On the ring finger, draw Minnie Mouse hand with dark grey acrylic paint (black + a little bit of white).
- Fill the inside of the hand leaving a thin outline of dark grey. Apply polka dots as well.
- Once step 5 is dry, apply three lines on the hand.
- Draw the outline of the bow with black acrylic paint. (How to do Hand Paint)
- Apply polka dots everywhere even on the bow outline.
- Draw the outline back on. Apply top coat to complete!
I’m relieved that the first day is passed safely…phew! I hope I can continue on tomorrow as well!!
Thank you very much for visiting!! <3


Is the red polish that beautiful or is it the quality of the pictures? Your drawings are really good.
Hehe, thank you so much!! Luckily OPI polishes are all amazing. Their colours always come out great in the photos 😀