Yesterday, I showed you the first part of making acrylic 3D sleigh (Acrylic 3D Sleigh Part 1). Let’s continue with the Part 2, shall we?
Oh, before we jump straight onto it, I just wanted to tell you that acrylic products can be harmful to your body or the environment if they’re treated in the wrong way. So please check out the basic info about acrylic nails before you start!
– Acrylic 3D Sleigh Part 2 Tutorial –
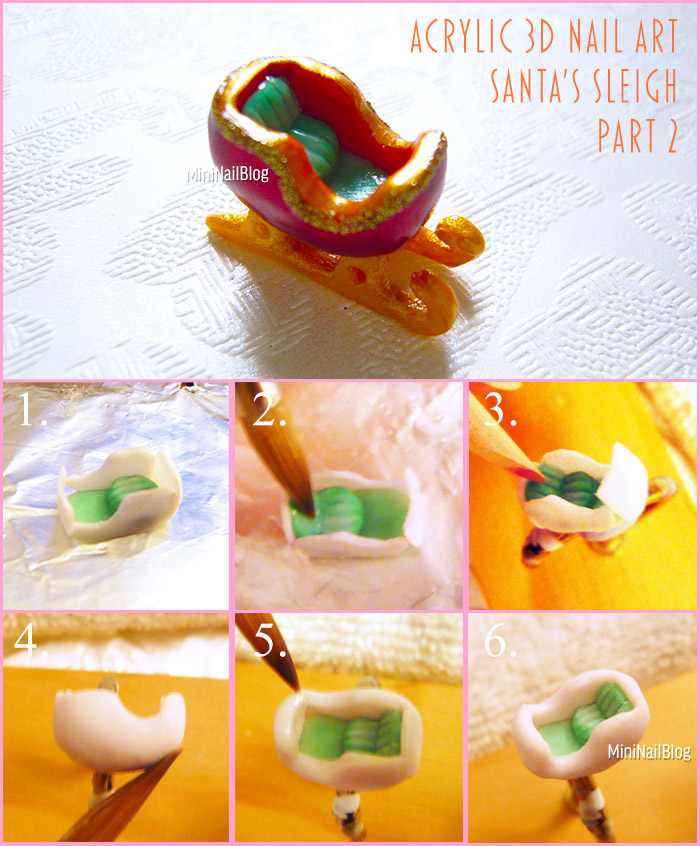
- This is where it was up to yesterday.
- Add the back of the seat with green acrylic mixture.
- Add the seams, using the sharp end of a wood stick while the mixture is still soft. I stuck the sleigh onto a ball of blu tack, so that I don’t have to keep holding it up.
- Cover the outside of the sleigh with white mixture. Stroke a lot to make the surface smooth.
- Cover the edge of the panels as well.
- The main part of the sleigh is completed!
Does it look like a sleigh to you now? or not yet? I’m going to create the legs and add some Christmassy colours to this, but I’ll have to do it tomorrow. I’m sorry!!
Thank you for being patient…(^3^)/***smooch!!