Did you know that you can use acrylic mixtures in many different ways? Acrylics are often used in nail extensions and nail strengthening, but today, I’ll show you my favourite way of using acrylics!
Creating acrylic 3D designs is what I really love and I can spend hours working on one design without getting too tired. So! This is what I made recently – Santa’s little sleigh. I have put the step by step procedure together, but if you’re interested in the basic information and techniques about acrylic nails, click here!
– Acrylic 3D Sleigh Part 1 Tutorial –
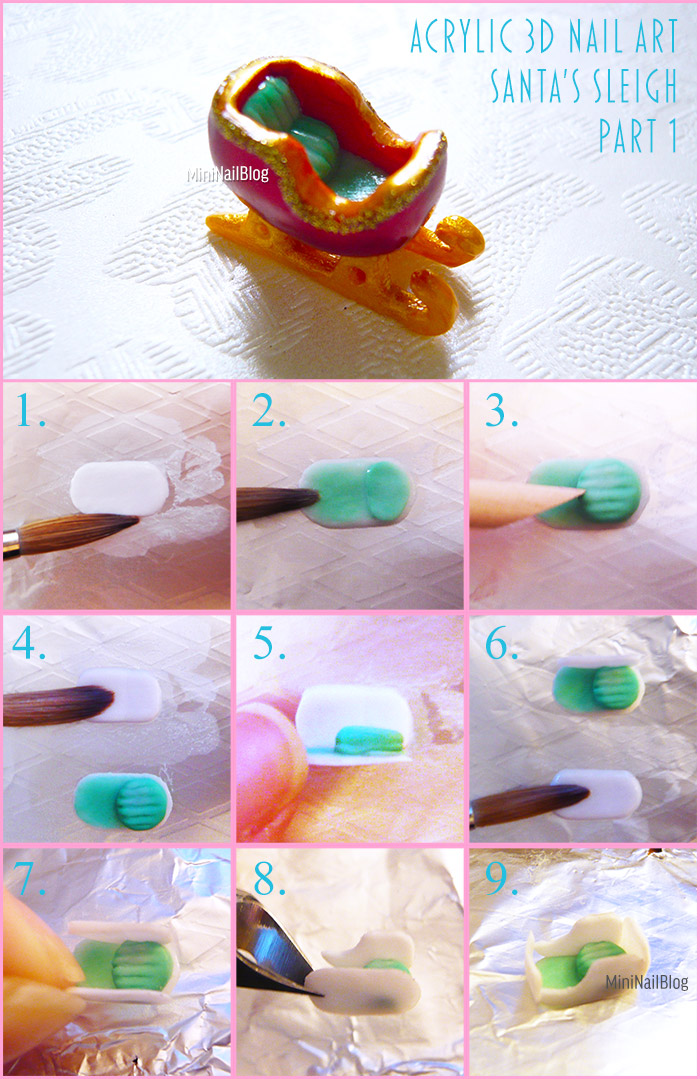
- Make a flat oval shape with white acrylic mixture. This is going to be the floor of the sleigh.
- Add green mixture to cover the surface. Create a seat with the same colour.
- Add more mixture to increase the thickness of the seat, and create the seams using the end of a wood stick while the mixture is still soft.
- Make a panel, similar size as the floor.
- Attach the panel to the floor and the seat, using a small amount of white mixture.
- Make another panel for the other side.
- Attach the panel on the other side.
- Cut out a quarter of each panel, using cuticle nippers.
- Add small panels at the front and back in the same way as the side panels.
There are a lot more steps to go but I’ll continue tomorrow so that you don’t get too bored!
Thank you!!







Thanks so much – and I hope you feel better soon! I have no idea what you’re making, but I’ll be fascinated to see what it turns out to be…
You can see my marbling efforts on my blog (linked). I think I still need some practice, but thanks to you, I think I’ll get it figured out eventually! 🙂