Finally, I’m going to complete the 3D sleigh I’ve been working on for the last two days! If you are interested in Part 1 and Part 2 of this tutorial, please click through. And of course, make sure to follow the Safety Precautions for Acrylic Nails before you begin.
– Acrylic 3D Sleigh Part 3 Tutorial –
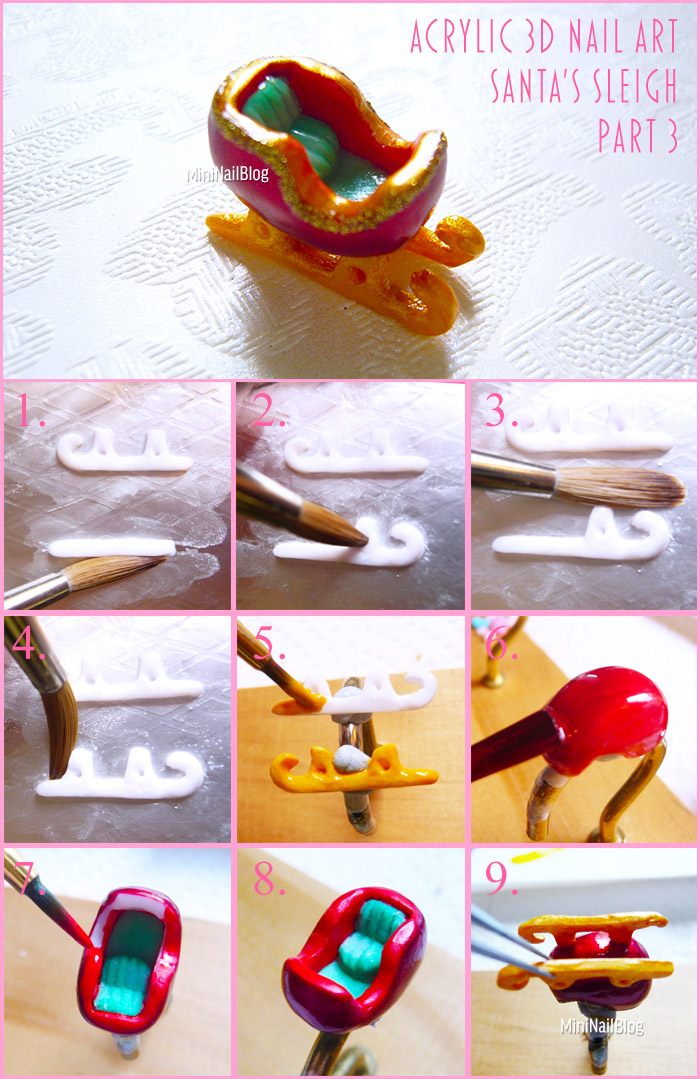
- Let’s start with the legs. Make a stick with white acrylic mixture on a piece of cooking foil.
- Add the curled end and a small bump. Create a small hole in the middle of the bump, using the tip of the brush.
- Flatten the top of the bump by pushing with a side of the brush.
- Make another bump as in step 2 and 3.
- Paint the legs with orange yellow acrylic paint. I added gold nail polish on top to give them a little sparkle.
- Paint outside of the sleigh with red nail polish.
- I used red acrylic paint and a small paint brush to colour the edges and inside of the sleigh.
- You can apply top coat for more shine. Allow it to dry well.
- Attach the legs using a small amount of acrylic mixture or top coat.
That’s it!! Did you enjoy this three parted tutorial? Now that I spent so much time making this, I’m not so sure if I want to use it for my nail decoration. Maybe I just keep it, hahaha!
Well! Thank you very much for being patient and staying with me!!


hi minnie!
that santa sleigh is so adorable!!
i hope you are feeling better!
are you going to make reindeer to go with the sleigh?
just a question, what kind of designs can you do for short nails? because i have short nails for work and i dont want to stick on acrylics or get gel nails rite now.
hi