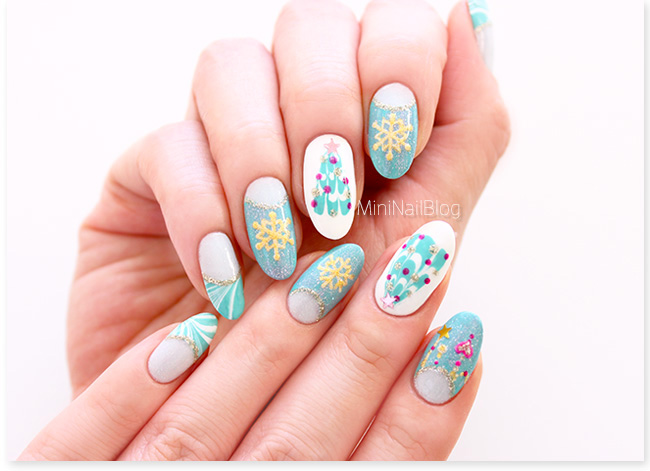
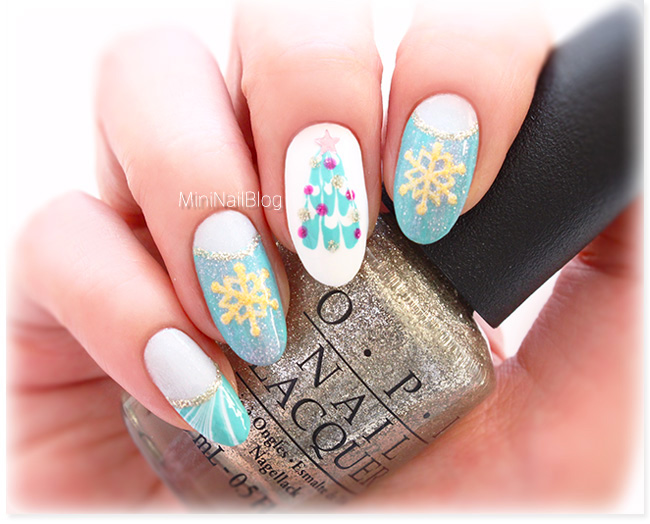
There are only a few more days to Christmas! Have you decided which nail art design you’re going to wear? I think I’m settled on these dry marble Christmas tree nails!
I always thought Dry Marble/Nail Polish Marbling would make the nails too thick and never dries before smudging them. But I really wanted a marbled tree design and decided to give it a try, and guess what? It wasn’t too bad!
I’ll let you know about a couple of key tips for the dry marble technique after the mini tutorial of the day!! Hope you like it 🙂
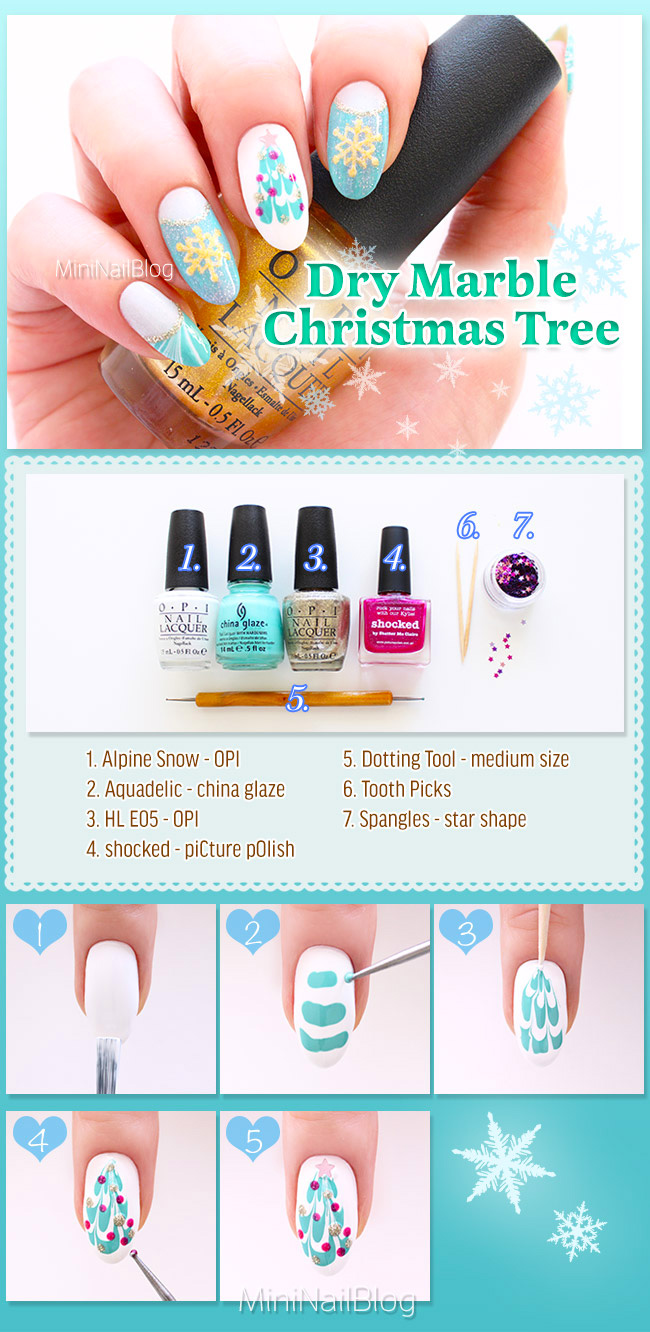
- Apply 2 or 3 thick coats of white nail polish (Alpine Snow – OPI). Don’t allow it to dry!
- Immediately apply three lines of mint green nail polish with a medium size dotting tool. (Aquadelic – china glaze)
- Quickly drag the surface of the wet nail polish with a tooth pick. Allow the nail polish to settle.
- Add gold and pink dots with a small size dotting tool. (My Favorite Ornament – OPI, shocked – piCture pOlish)
- Add a star shaped spangle at the top. Apply top coat to complete.
A few lessons I’ve learnt from doing this design were:
- Drag only the surface of the nail polish – do not let the tooth pick touch the actual nail.
- Drag as fast as you can – this will create nice straight marbling lines.
- Allow the nails to dry for about 30 mins after top coat application.
You may not need the half an hour drying time if you had a fast drying top coat (I wish I had one!!!). 🙂
I hope you are all prepared and excited for this Christmas break!! Please have a wonderful time with your friends and family…<3
Thank you for visiting!! <3 xxxx



This is so lovely! I have never seen dry marbling look better than this to be honest- very clever use for it!
Awww, You are too kind to say that!! Thank you soooo very much!! 😀 <3 xxxxx
These are really cute and I LOVE the blue and white colors!
So cute:) by the way I would like to know where you buy your nail art brush ?
Thank you! My medium and large paint brushes come from my local art stores and the tiny ones are from Japan ;D
cool, your trees looks great 😀
love snowflakes too 😀
Yaay!! Thank you so much sweetie!! <3 xxxxx
Omg, they are so pretty 🙂 great job
Thank you soooo very much!!! I’m glad you think so!! 😀
I have just tried these and I got so many good compliments from other people about my nails so u would just like to thank you very much and I would love it if you done some more Christmassy nail art this year as well xx
Aww! Thank you so very much for your wonderful comment Lauren!! I’m so glad to hear that people loved your design so much 😀 I’m so sorry for not being able to do any Christmas nails this year 🙁 But I hope I’ll be able to do some winter designs 🙂 Thank you again!! <3 xxx