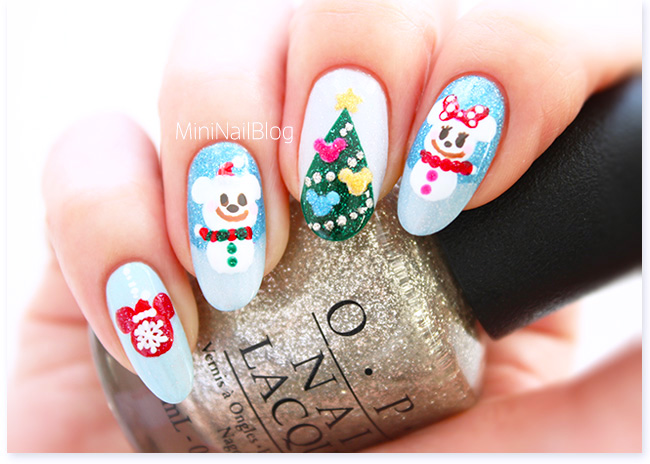
These Mickey Snowman Nails were inspired by the very sweet creative lady Hannah from @hannah_nails_it on Instagram! I LOVE all of her awesome character nail designs which always make me happy when I see them.
My Mickey Snowman was pretty easy to do, so I decided to make a video!! But if you prefer the step by step mini tutorial, it follows after the video ;D
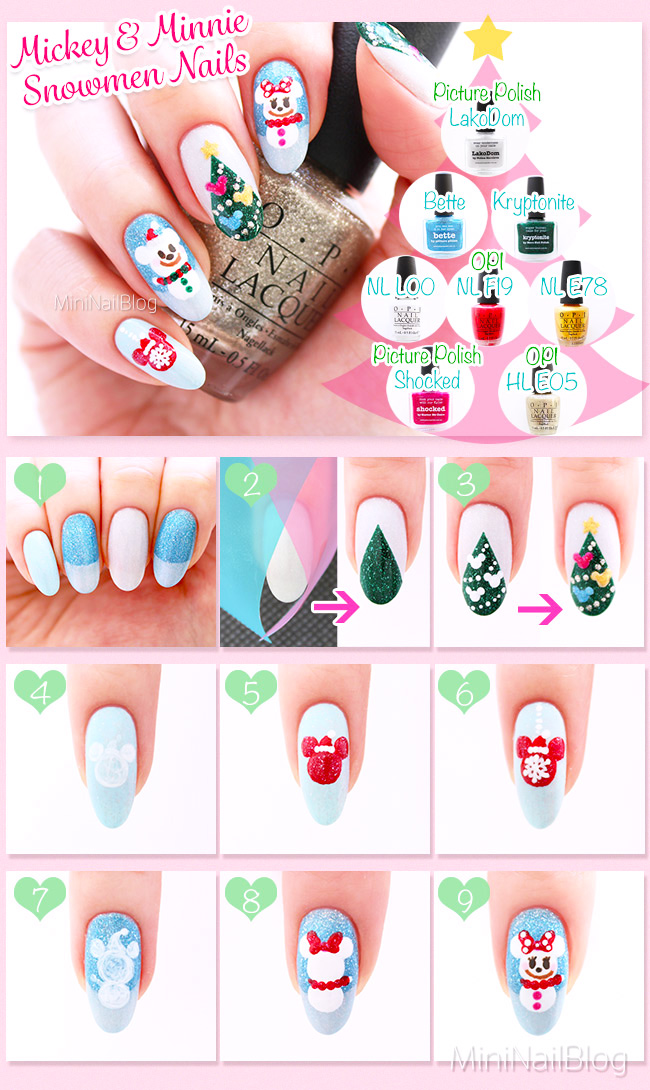
- Apply nail polish on all nails (details below).
- For the thumb and middle finger, place two strips of scotch tape diagonally to create a triangle. Fill the triangle with green polish.
- Add decorations with white polish using a dotting tool. Add some colours on top (details below).
- For the pinkie, roughly draw a Mickey shaped ornament with white acrylic paint.
- Add red polish on top.
- Draw a snowflake with white acrylic paint.
- For the index and ring finger, draw the outline of Mickey and Minnie snowmen with white acrylic paint.
- Fill with white polish and add the ribbon and scarf with red polish.
- Hand paint the face with acrylic paint. Apply top coat to complete.
– Nail Polishes I used –
- LakoDom – Picture Polish on the thumb and middle
- Bette – Picture Polish, and LakoDom french tip on the index and ring
- Bette and LakoDom on the pinkie
- Shocked and Bette – Picture Polish, NL E78 and HL E05 – OPI for the Christmas tree decoration
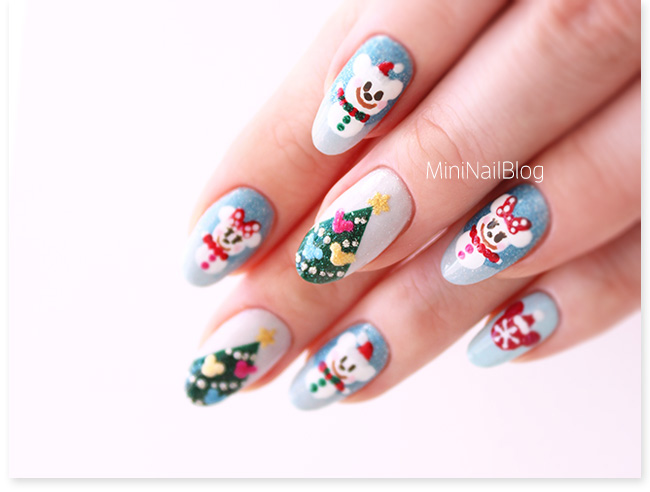
What do you think?? It’s not too hard to make this design especially the Christmas tree 🙂 Please give it a try if you like it!
Thank you for visiting!! <3 xxxxx


super cute, love it 😀
Really happy you think so!! Thank you so much sweets 😀 <3