- Allow you to increase the length of the nails
- The tough and flexible material provides a support to the natural nails
- It is a good deterrent for nail biters
- Note: This technique can also be called acrylic sculpture
What you need
Please read through Safety Precautions for Acrylic Nails before you start.
Acrylic Nail Extensions Procedure
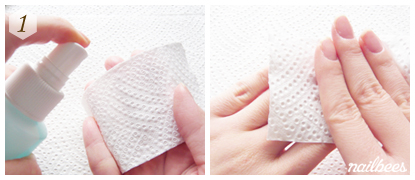
- Prepare the natural nails by following Acrylic Nails Step 1 – Natural Nail Preparation
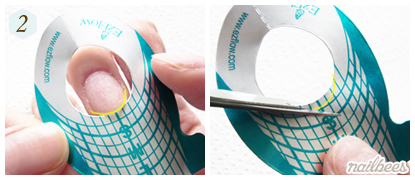
- Apply forms by following Acrylic Nails Step 2 – Forms & Mixtures.
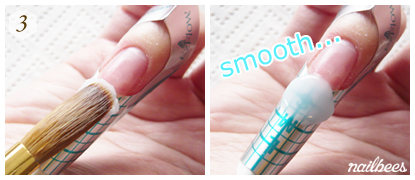
- Pick a large ball of mixture and place it onto the free edge. Allow the mixture to get smooth.
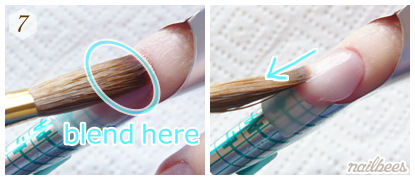
- Tap the mixture to level it with the natural nail. This technique is called blending.
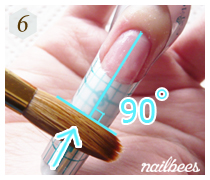
- Gather the mixture from both sides to create the straight side lines. Occasionally stroke the surface to create an even thickness.
- Straighten the free edge to create a square shape.
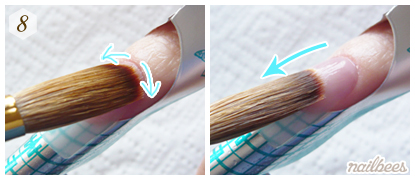
- Place a mixture onto the center of the nail plate. Then blend into the natural nail. Stroke a few times towards the free edge to blend into the previous mixture.
- Place a small mixture onto the nail plate close to the cuticle line. Spread to the sides without touching the cuticle. Stroke to smooth the surface.
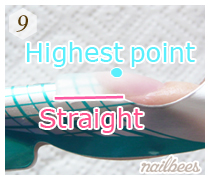
- The ideal nail shape has the straight side lines with a smooth curve. The highest point of the curve should be at the center of the acrylic nail.
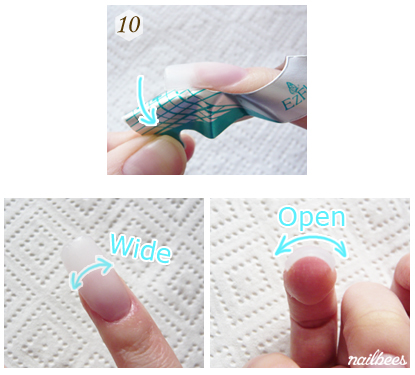
- Carefully remove the form. This is how the nail looks like at this point. It is wide and the free edge is also wide open. In this shape the acrylics come off very easily.
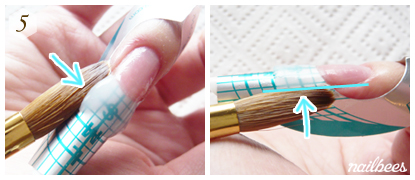
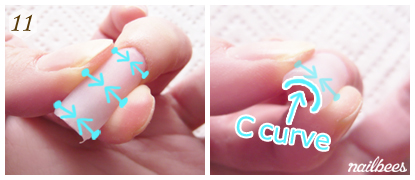
- Apply pressure from the 3 spots shown below to tighten. This will make the acrylics grip onto the natural nail better. It also creates a nice C curve in the free edge.
- Apply acrylics on the rest of the nails to complete Acrylic Nail Extensions
Next Step in Acrylics – Filing & Buffing


