Master how to apply toenail polish to complete your perfect looking feet.
What you need for Toenail Polish
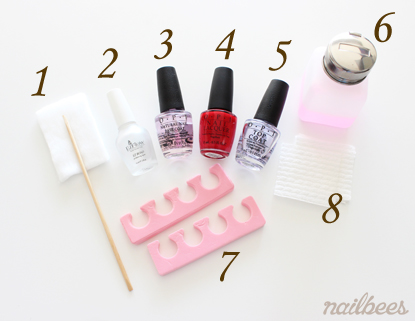
- Sharp Cotton Stick
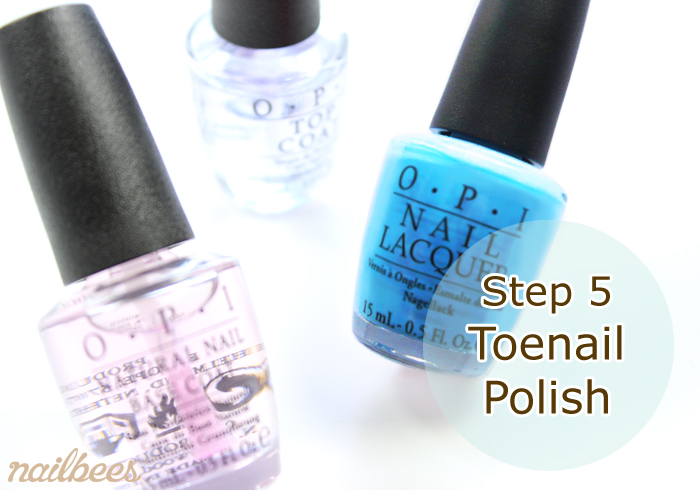
- Pre-Primer
- Base Coat
- Nail Polish
- Top Coat
- Nail Polish Remover
- Toe Separators
- Gauze
Preparing a Sharp Cotton Stick for Professional Finish
Let’s make a sharp cotton stick using an orangewood stick and a file!
- File down the end of stick evenly on both sides.
- Check regularly to make the end sharp and flat. It should look like a canoe paddle. It doesn’t need to be a corn shape like a pen.
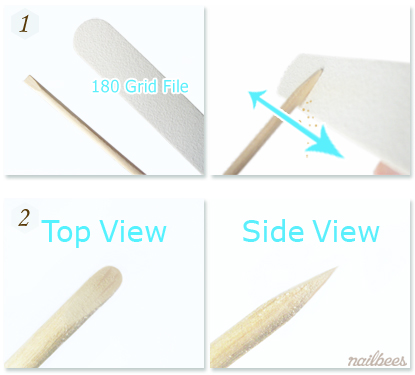
- Pick a small fluff of cotton wool with the tip of the stick and roll it in between fingers. You can use this at the end of nail polish application to perfect your nails!

Toenail Polish application
Step 1. Prepare your toenails
- Wipe the toenails with gauze and nail polish remover to clean.
- Apply pre-primer on all toenails. This will remove excess moisture and allow the nail polish to last longer.

Step 2. Base Coat
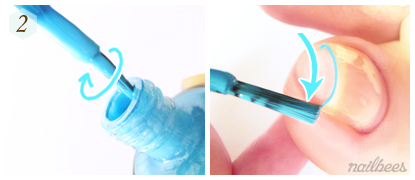
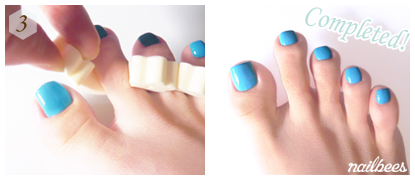
- You can put the Toe Separators on at this point.
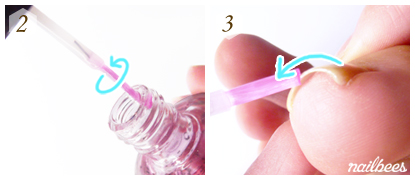
- Rotate brush in the bottle neck to remove excess base coat as well as make the brush skinny.
- Using the tip of the brush, apply on the free edge in one swiping motion.
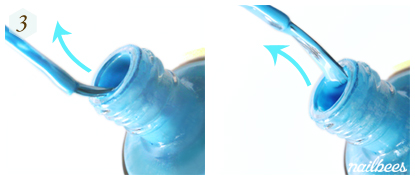
- Pick base coat for the Nail Plates by adjusting the amount in the bottle neck. Do this in a scraping motion to make the brush flat at the same time.

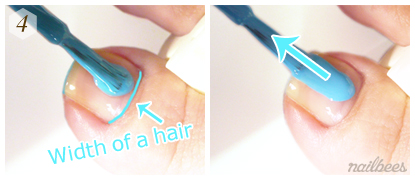
- Place the brush close to the cuticle area and push it up to get as close to the cuticle line as you can. Ideally leaving a gap which is only the width of a hair. And then drag the brush towards the free edge.
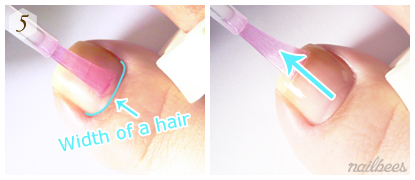
- Spread the base coat to the sides. Follow the yellow dotted line with a corner of the brush (blue corner) so that the brush will not touch the skin.
Step 3. Nail Polish
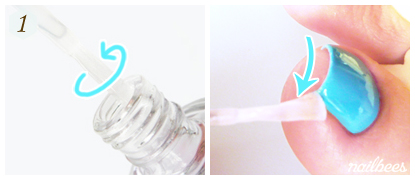
- Rotate the nail polish bottle between your hands to mix. Don’t shake it.

- Rotate brush in the bottle neck to apply on the free edge.
- Stroke the brush in the bottle neck to make the brush flat, leaving a drop of nail polish on the end of the brush.
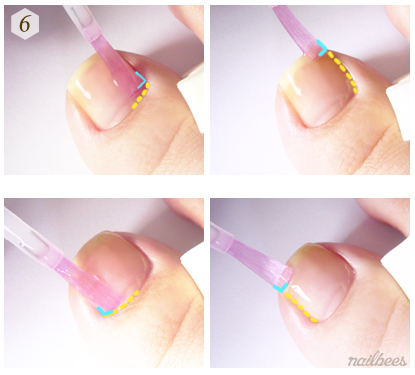
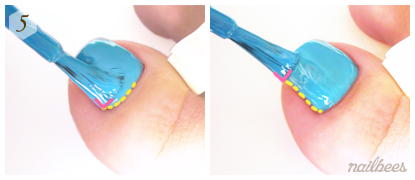
- Place the brush close to the cuticle and push it up to the cuticle line leaving a gap which is only the width of a hair. And then drag the brush towards the free edge.
- Spread the polish to the sides. Follow the yellow dotted line with a corner of the brush (pink corner) so that the brush will not touch the skin. Stroke the surface a few times to even out.
- Allow the polish to dry and then apply the second coat in the same way but with more polish and less pressure in the brush so that the brush won’t dig into the first coat.

- Wipe away polish smudges with nail polish remover and the Sharp Cotton Stick we made earlier.

Step 4. Top Coat
- Make the brush skinny by rotating the brush in the bottle neck. And then apply onto the free edge.
- Pick a generous amount of top coat in the same way as nail polish. Apply onto the nail plate very lightly to avoid digging into nail polish underneath.

- Allow the polish to dry before taking the toe separators off.
To avoid painting the skin
- If you have a habit of painting the skin, let’s practice on this Practice Sheet first!
- Please print out the sheet and use it on top of some old news paper or a magazine so that the polish won’t stain your table.
Next Step in Pedicure – How to Remove Toenail Polish


